PDF Output Using Adobe InDesign
Some options may vary depending on what version of InDesign you are using.
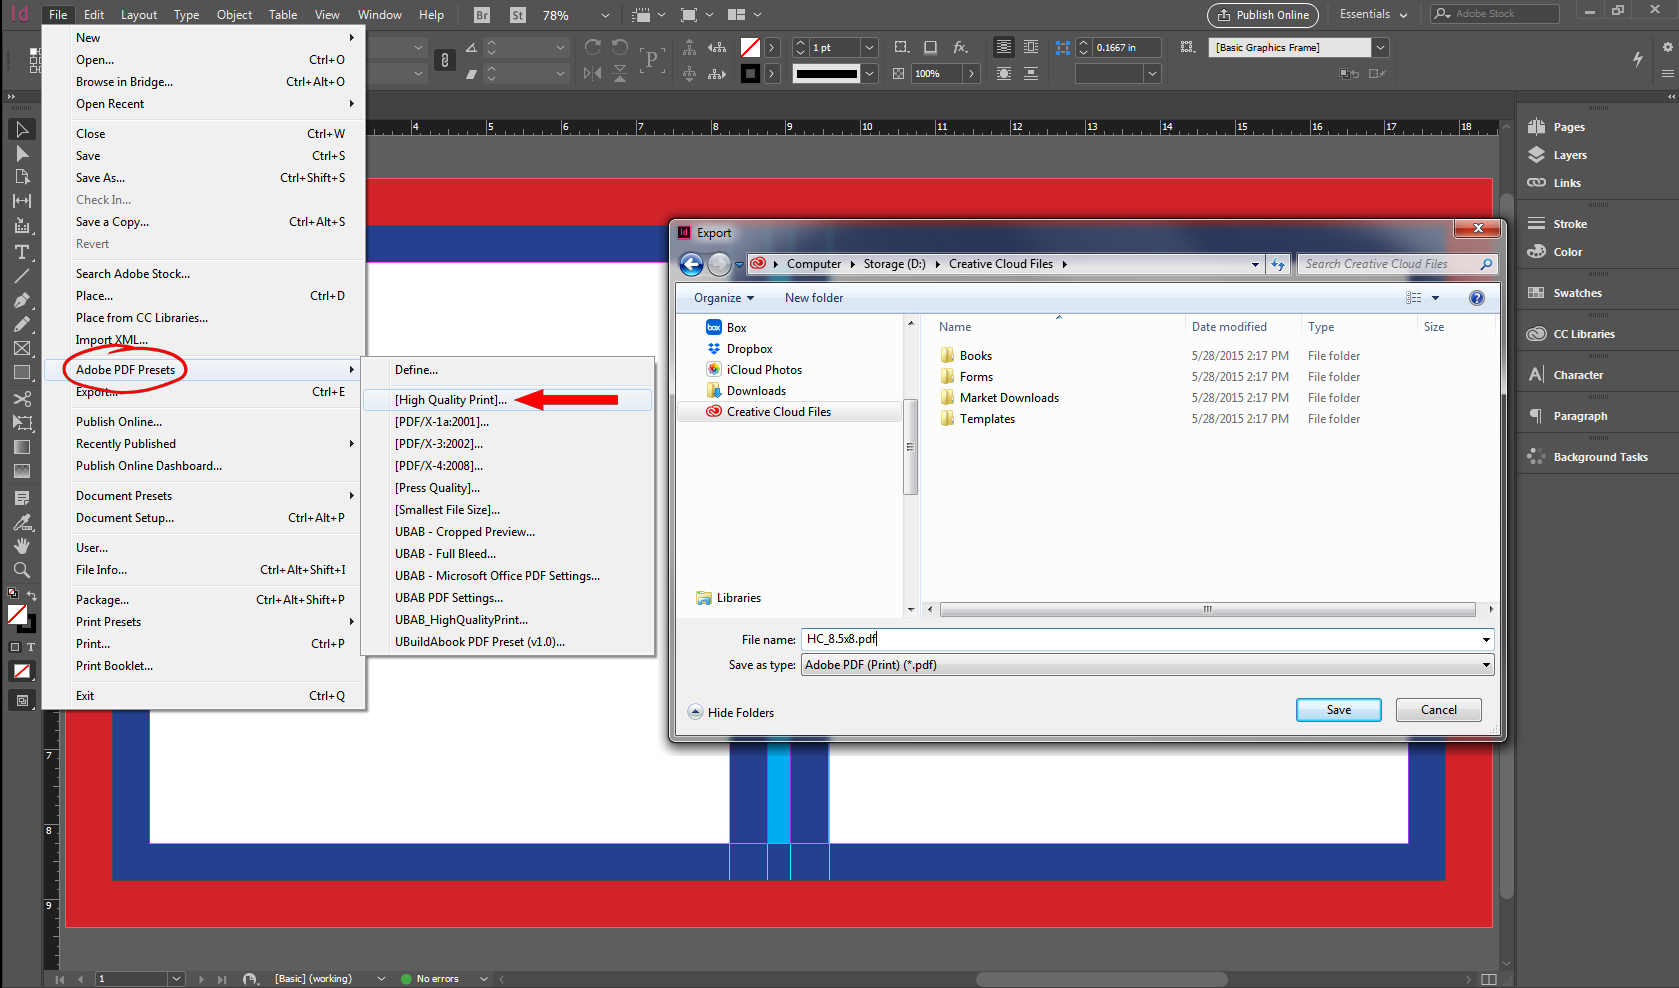
- When you are ready to create a PDF go to the File menu and click on Adobe PDF Presets and [High Quality Print]...
- Once the Export window opens pick a save location that's easy to find and name your file.
Example: "YourName-FileType-(Date).pdf"
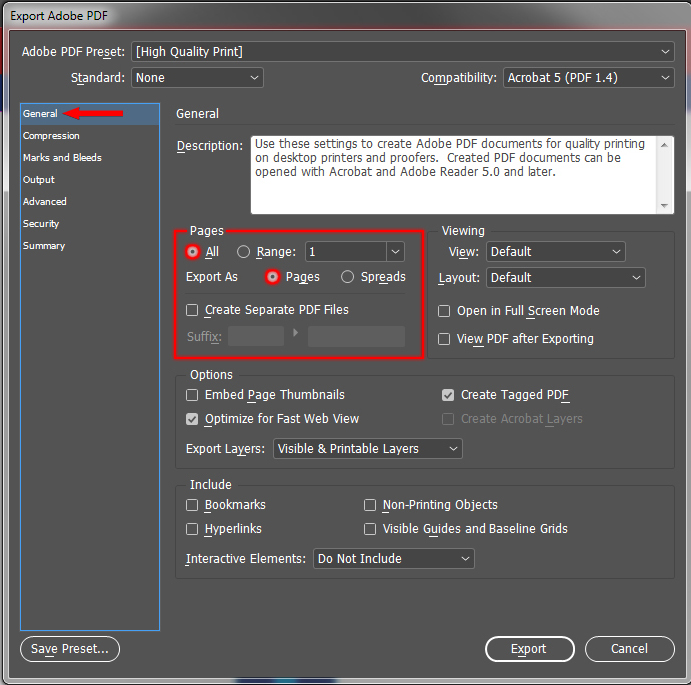
- Next the Export Adobe PDF window will open. Under the General tab, make sure Pages is set to All and Export As is set to Pages.
- Under the Marks and Bleeds tab make sure All Printer's Marks is turned OFF, and Use Document Bleed Settings is turned ON. The Bleed section should match your document settings.
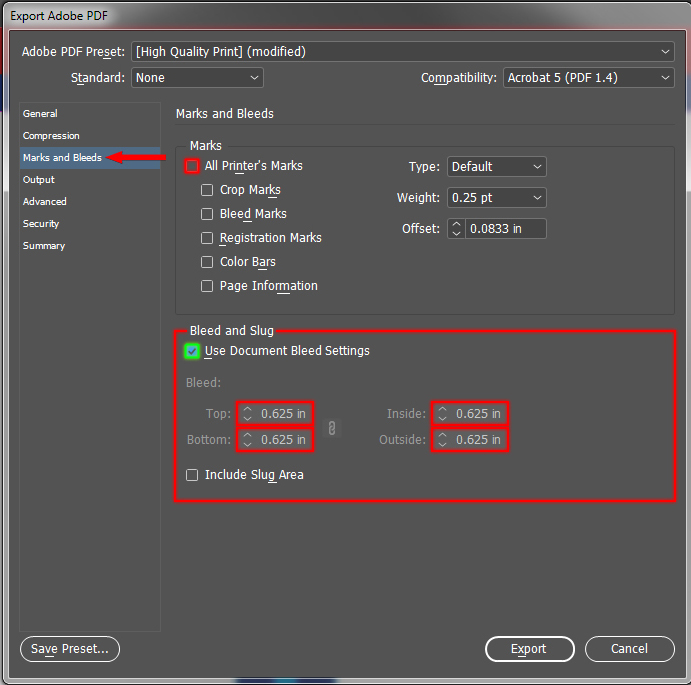
(Please Note: The numbers shown in the image above are not what your bleed should be, it shows the bleed settings of your InDesign File, usually .25")
- Before you click on Export make sure to click on Save Preset... and call it UBuildABook. Now every time to want to make a PDF you can select UBuildABook from the Adobe PDF Presets menu instead of adjusting these settings every time.
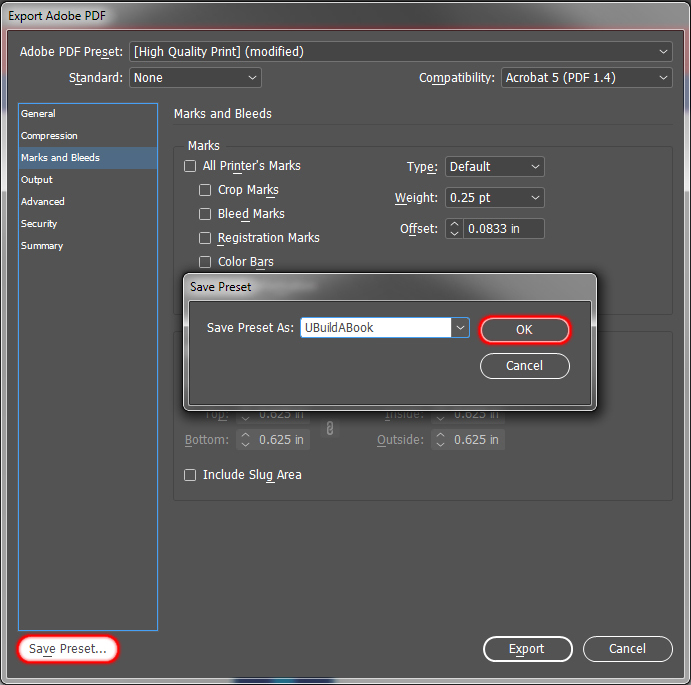
- After you have saved the Preset for later use you can click on the Export button and you will produce a PDF that matches the setting you used in InDesign.
Upload to
UBuildABook