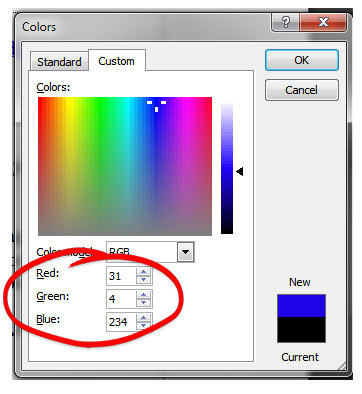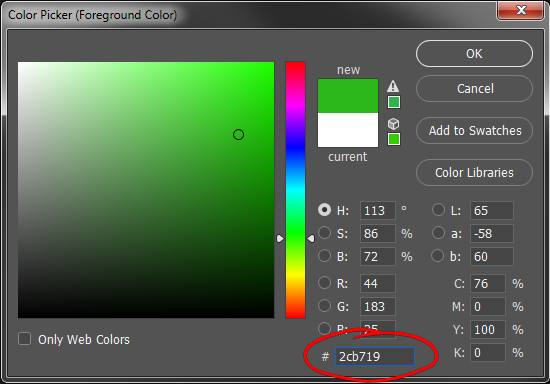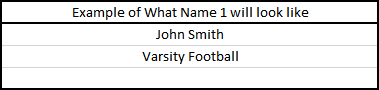

In order to personalize your cover you will first need to contact Customer Service to make sure your order qualifies for personalization. Next you will need to download our personalization template below: Once you have downloaded the personalization template open it up in Excel or Google Sheets. When opened you will see 2 tabs, 1 for Hard Cover books, and 1 for Soft Cover books. Make sure the names are added to the correct sheet, if you are only doing 1 type of cover (Hard or Soft) then you can delete the sheet you aren't using. On each sheet there are 4 main columns(Line 1, Line 2, Line 3, Images) and instructions to the right of these columns. Please read through the instructions and fill out the required fields. (Font Size, Font Type, Font Color, Location, etc.) For the color field you will need to enter the RGB color or the HEX Code. You can have up to 3 lines of text and 1 image(optional). Each part of the personalization you want on a new line goes into the next column. If you would like to include a photo personalization you will need to put all the images in a zip file and the files must have the following: You will put the name of the file in the Image column in the row with the matching name. If you look in the instructions section you can see an example that shows each line of text. When you've finished filling out the template save it and then click on the File Submission Form button at the bottom of the instructions(under the example shown above).![]() Download Personalization Template
Download Personalization Template